User and Role Management
The Access Management section allows administrators to manage users and their roles in the system. The section includes four key subsections:
- Users
- Roles
- Groups
- LDAP
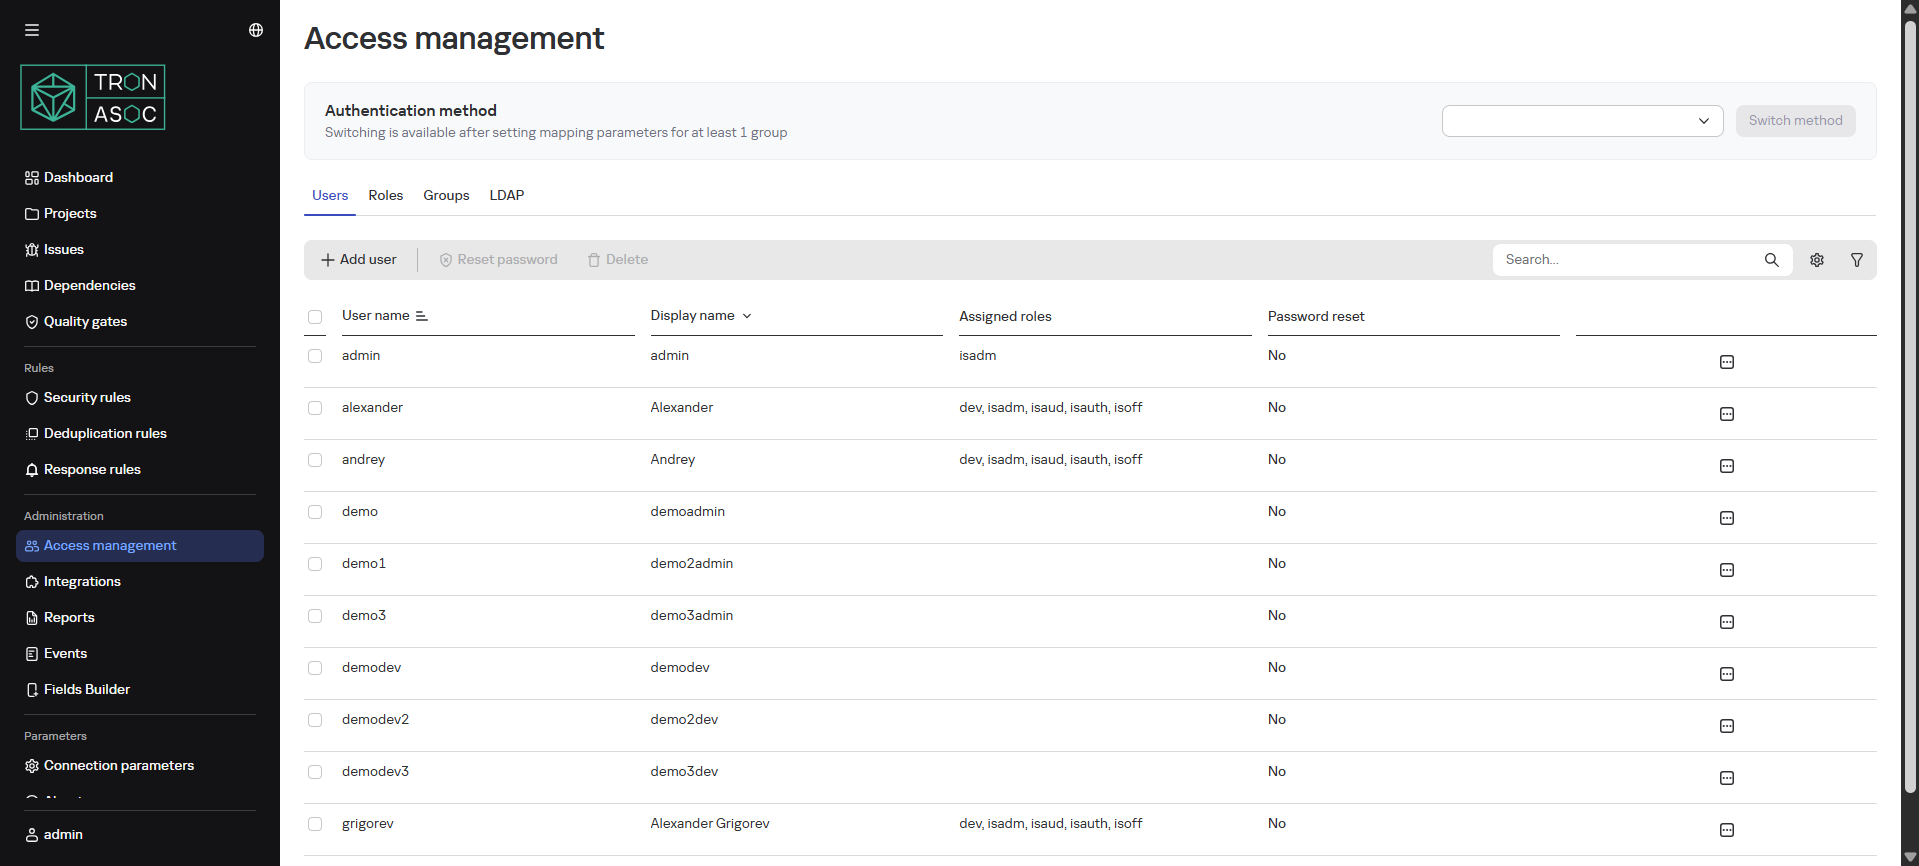
Users
The Users tab provides a list with the following information about users:
- Username - unique login or user identifier
- Display Name - name visible to other users
- Assigned Roles - list of roles assigned to the user
- Password Reset - indicator whether the user needs to reset their password. Value Yes means the user must change their password on next login
Adding a New User
To add a new user, follow these steps:
- In the Access Management section, click the Add User button
- In the opened Create User window, fill in the fields:
- Username
- Display Name (optional)
- Email
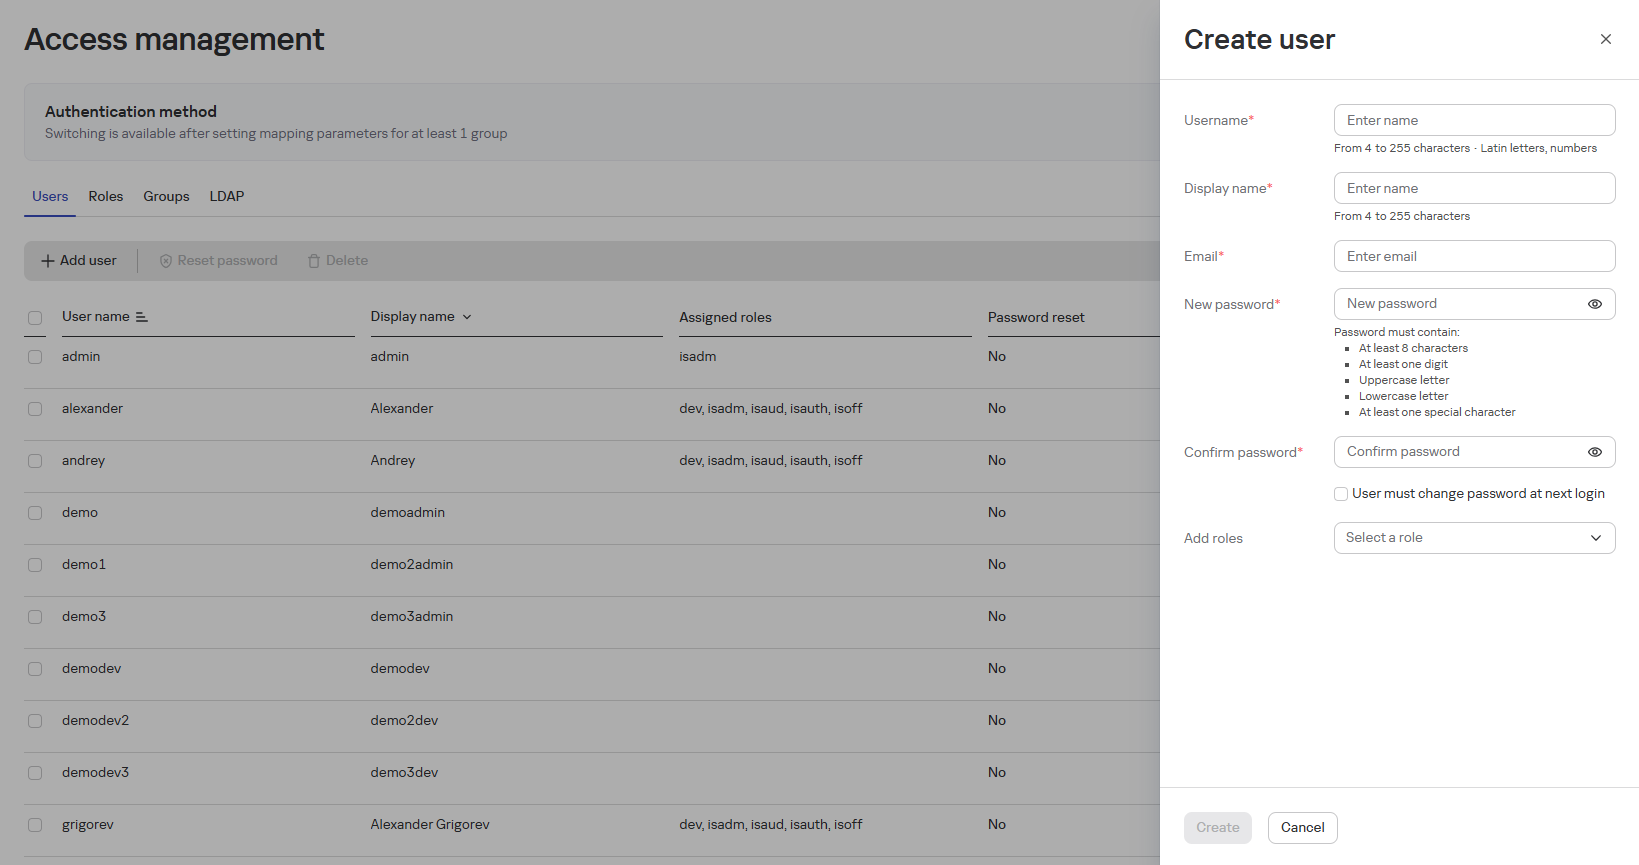
- Enter a password (complying with authorization rules) and confirm it in the Repeat Password field
- Assign necessary roles in the Roles to Assign block
- If needed, enable the password reset option
- Click the Create button
Editing a User
To edit user settings, follow these steps:
- In the Access Management section, find the user in the list and click their name
- On the editing page, modify the data (except the username)
- Click the Save button
Deleting a User
To delete a user, check the box next to the user in the list and click the Delete button.
User deletion may be irreversible.
Password Reset
To initiate a password reset, do the following:
- Find the user in the list and change the Password Reset value to Yes.
note
On next login, the user will be required to change their password.
You can also clear user sessions and reset passwords through the submenu options in the user list.
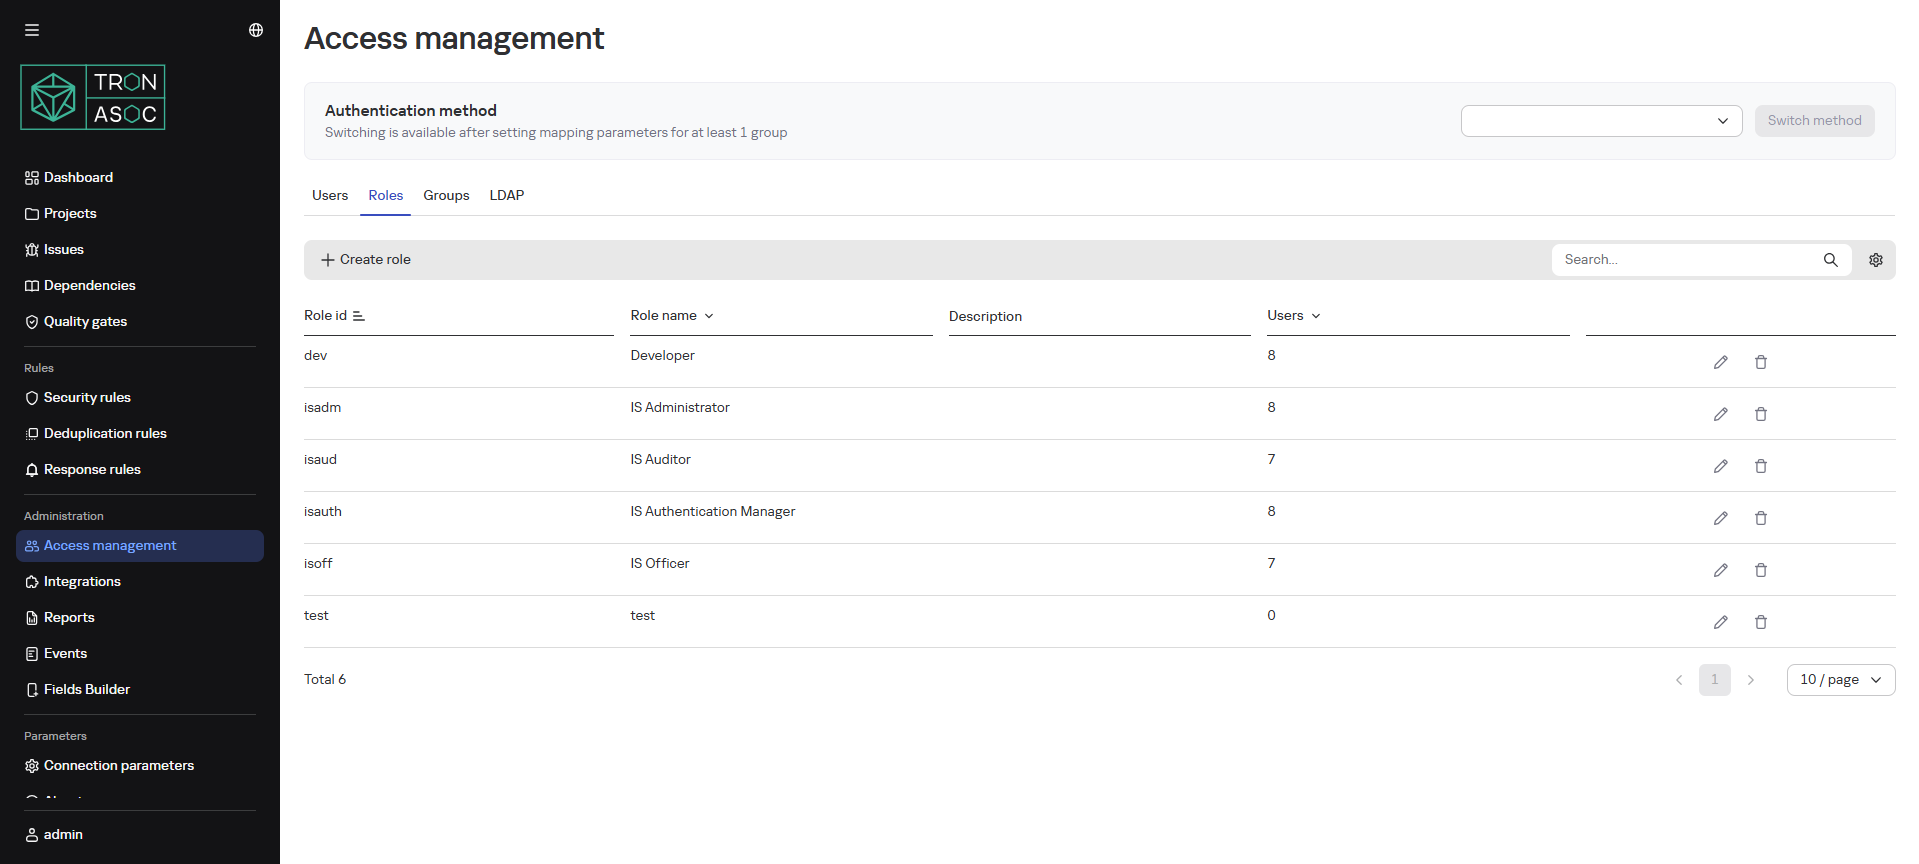
Role Configuration
The Roles tab displays all system roles with the number of users assigned to each role.
Basic System Roles
| Role | Description |
|---|---|
| Administrator (isadm) | Role with full permissions, assigned all existing rights during product installation. Intended for users responsible for deploying and maintaining infrastructure and system software required for the solution (e.g., operating systems, application servers, databases), as well as those responsible for creating and managing user accounts, roles, and access, modifying settings, license control, connecting security tools and scan sources. |
| Auditor (isaud) | Role intended for monitoring data and system security, tracking user actions and system operations, analyzing event logs, monitoring scan results and Quality Gate compliance. |
| Security Engineer (isoff) | Role intended for controlling and ensuring information security of developed projects, configuring security rules and threat monitoring, managing security tools and scans. |
| Developer (dev) | Minimal basic role, intended for users performing compliance checks, viewing scan results, and excluded issues. |
- The Administrator role cannot be deleted (only blocked)
- Other roles can be deleted
Adding a New Role
It's recommended to assign the minimal basic role and add additional permissions through groups (permissions from roles and groups are cumulative).
To add a role, follow these steps:
- In the Access Management section, on the Roles tab, click Create Role.
- In the opened window, fill in:
- Role ID
- Name
- Description
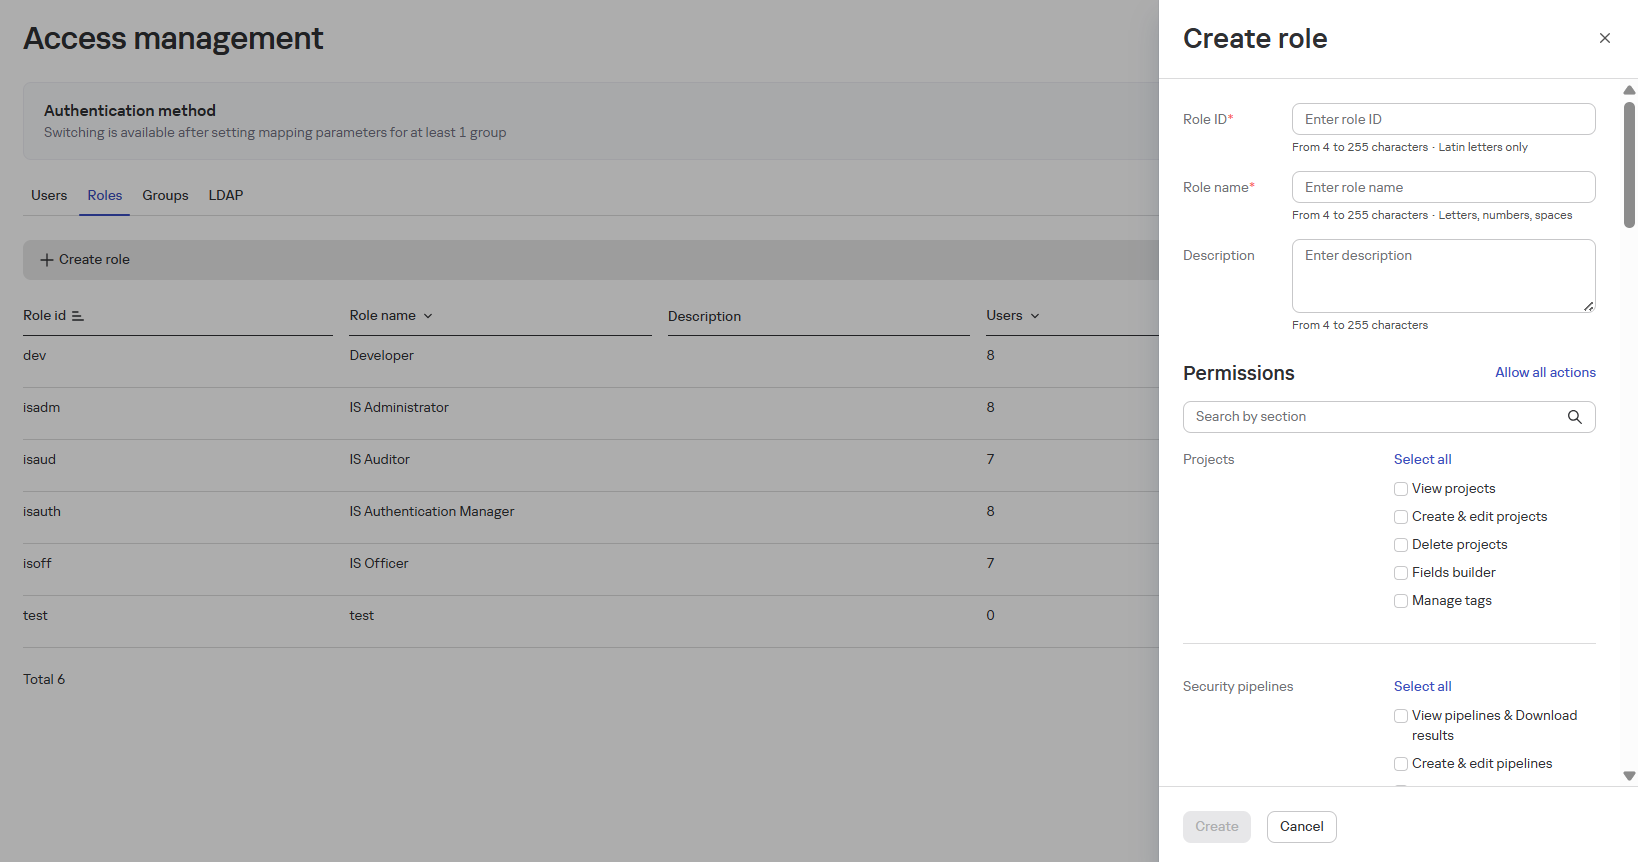
- Configure permissions:
- View/create/edit/delete projects
- Field builder, tag management
- View/create/edit/delete security pipelines and upload results
- Click the Create button
Adding User Groups
Functionality:
- Create/edit/delete groups
- Add users to groups
When adding new users to a group, the additional permissions specified in the group are added to the user's role permissions.
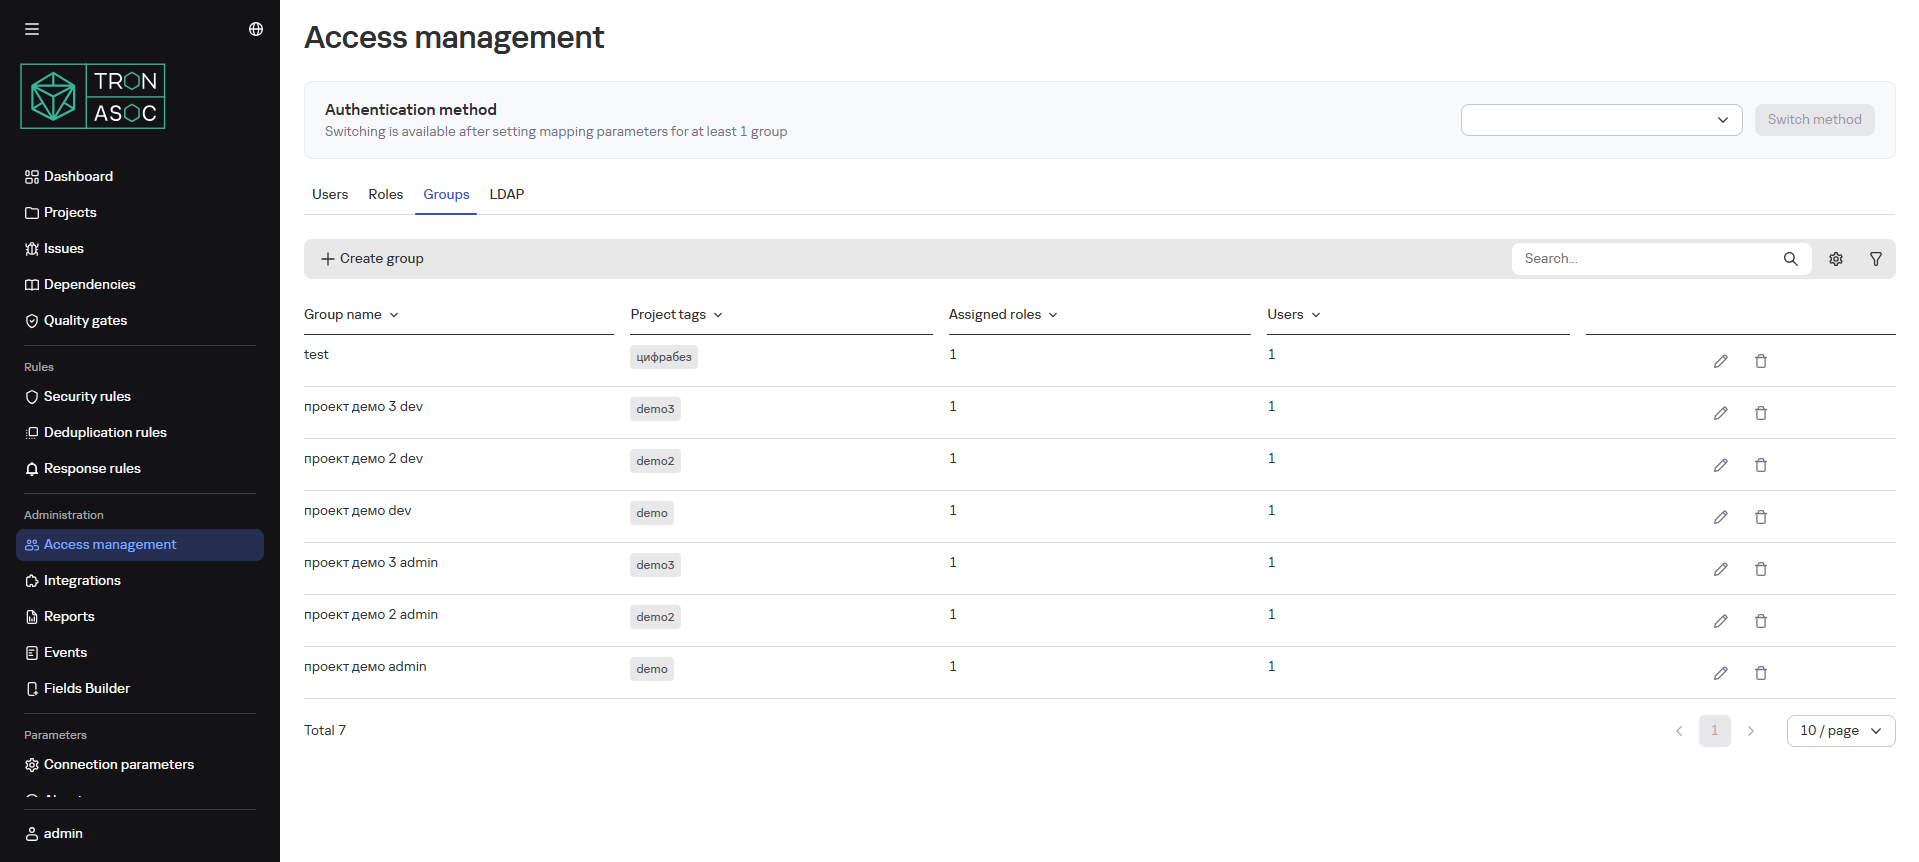
To create a group, follow these steps:
- In the Access Management section, on the Groups tab, click the Create Group button
- In the opened form, fill in:
- Group Name
- Roles
- Project Tags
- Users
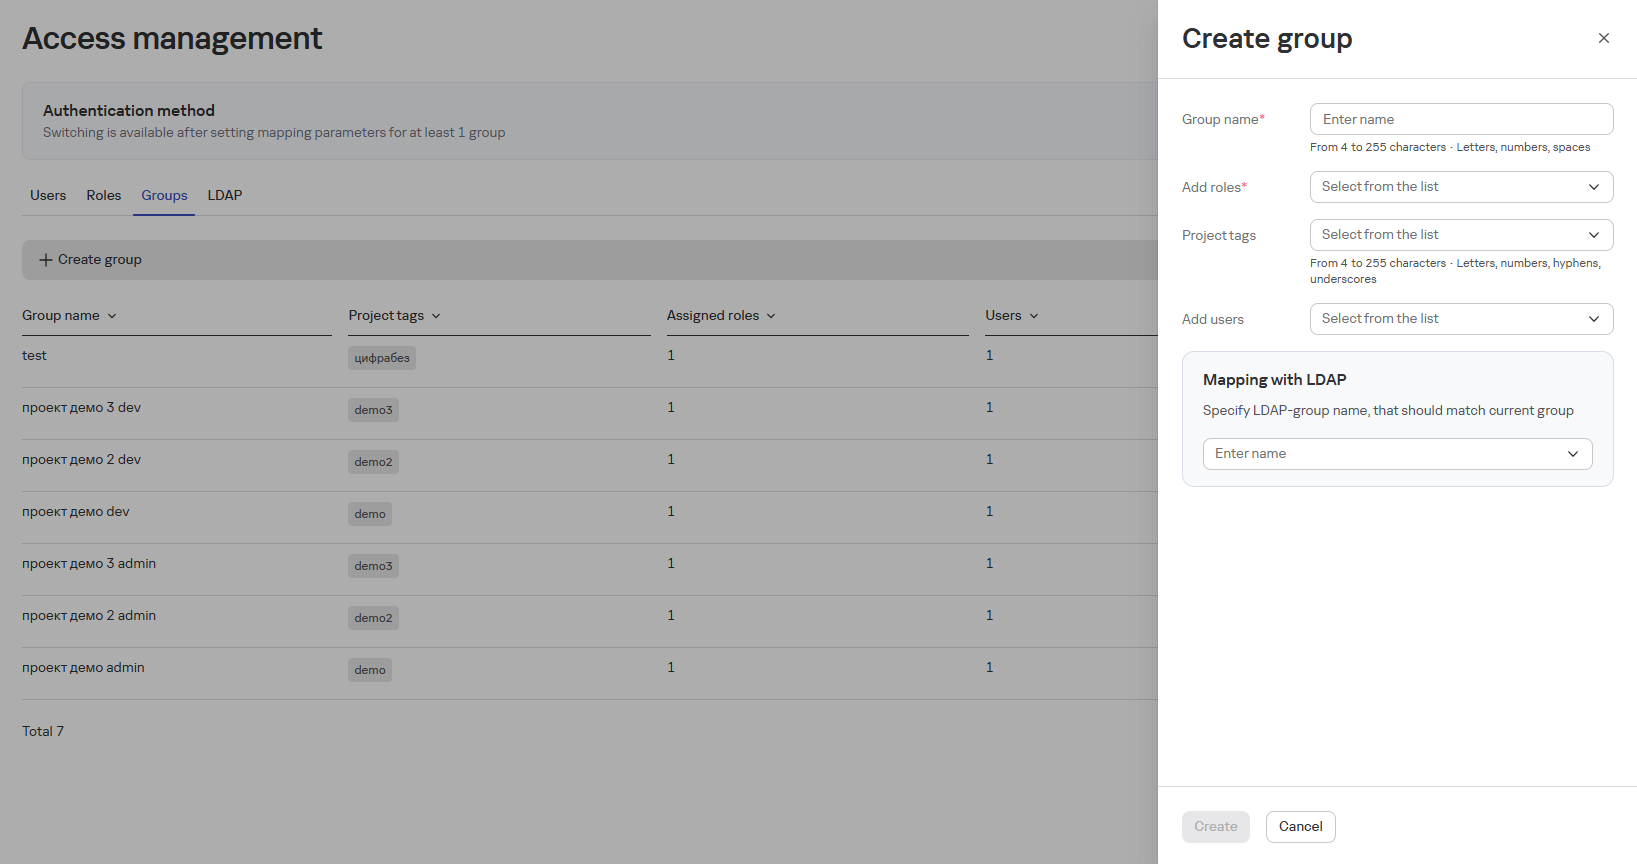
- Configure LDAP mapping (if needed)
info
To add an LDAP group, you need to add integration with LDAP/AD (see below LDAP Authentication), after which the LDAP/AD group will appear in the list of groups in the LDAP Mapping block.
- Click the Create button
LDAP Authentication
The LDAP tab is designed for convenient and secure user and access management using integration with LDAP or AD.
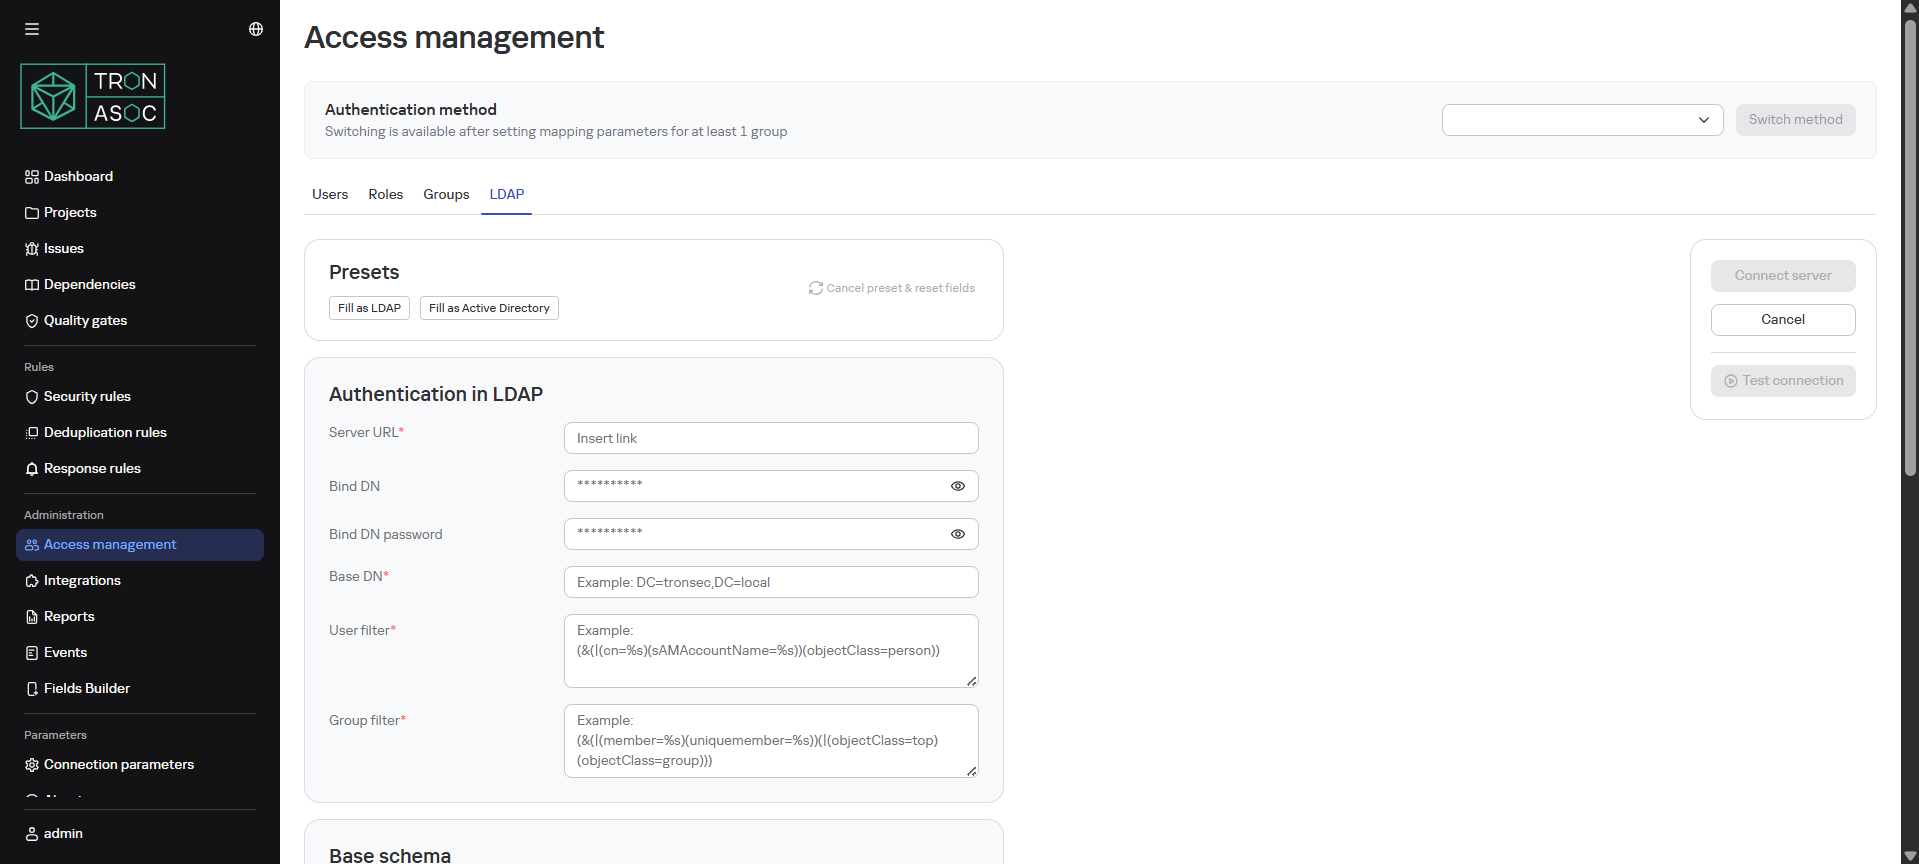
When updating TRON.ASOC to version 1.3, it is necessary to reconfigure the integration with LDAP/AD (version 2.0.02 is supported).
For configuration, follow these steps:
- In the Access Management section, on the LDAP tab, select a preset (LDAP or Active Directory)
- Fill in the parameters:
- Server URL
- Account Name - name of the account used for authentication when connecting to the LDAP server
- Account Password - password of the LDAP account
- Base Distinguished Name - main contextual path (Base DN) where LDAP queries will be executed
- User Filter - user search filter
- Group Filter - group search filter
- Organizational Unit Name - attribute that defines the user's organizational unit
- Distinguished Name - attribute that defines the distinguished name (DN) of the user or group
- User First Name
- User Last Name
- Group Name
- User Login
- User Email
- Group Member
- User Groups
- After filling, ensure all LDAP parameters are configured correctly and the system can successfully connect to the LDAP server. To do this, click the Test Connection button.
- Click the Save button.
During the reconnection check, the Account Name and Account Password from the last saved successful connection test are used. When editing the connection credentials, you have the option to view them and verify they are entered correctly.
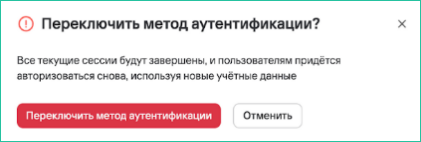
Authentication Methods
After configuring LDAP/AD integration, it's recommended to select an authentication method. To do this, follow these steps:
- In the Access Management section, on the Groups tab, add at least one group (or edit an existing one) with configured connection to an LDAP group (LDAP Mapping block)
- Select one of the methods in the Authentication Method block:
- Internal Model and LDAP
- LDAP Only
- LDAP Disabled
- Verify the entered data is correct and click the Switch button
When changing the authentication method, all user sessions will be closed, and subsequent authorization will be performed according to the selected method.