Security Pipelines and Security Checks
Security Pipeline is a grouping entity for Security Checks. Users have the ability to create new ones and configure available ones, according to their assigned role, for previously created Security Pipelines.
In TRON.ASOC, each Security Pipeline is linked to a project.
To start working with Security Pipelines, navigate to the Projects section, find the required project, open its overview, and then go to the Security Pipelines tab.
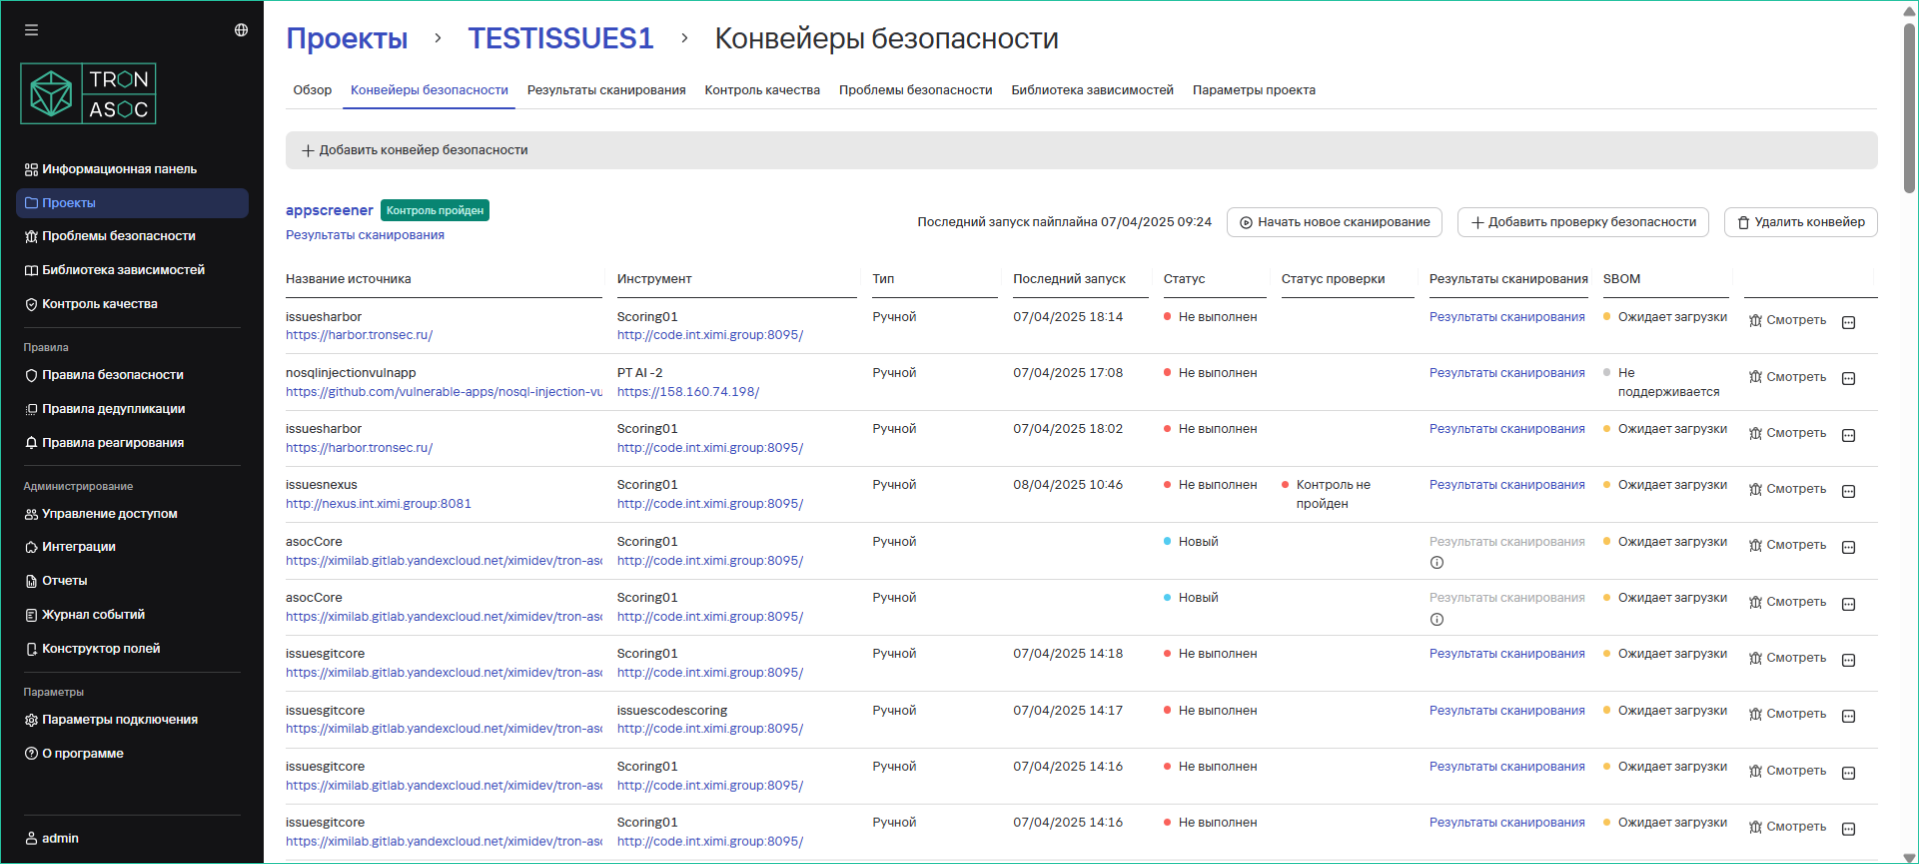
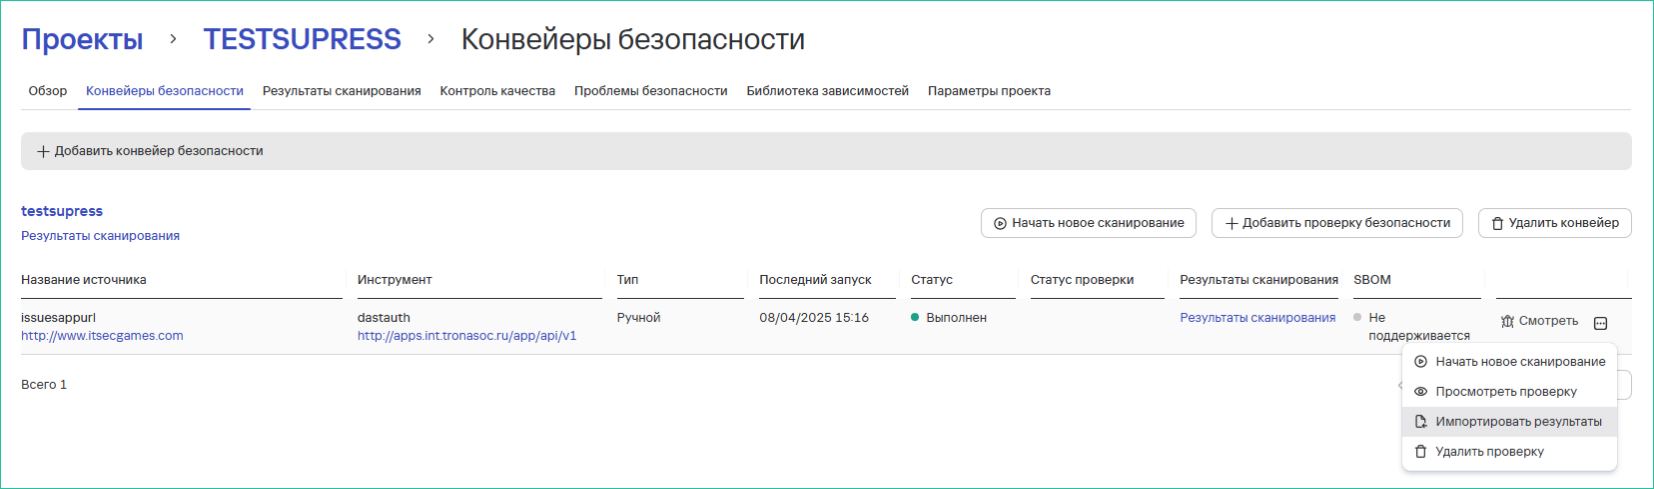
Each Security Pipeline is represented by a separate row, which contains:
- Name and description of the pipeline
- Link to scan results
- Security checks contained within the pipeline
Data for each security check is also displayed:
- Name of the security check in the pipeline
- Security tools and sources used in the check
- Check type (manual or automatic)
- Time of last run
- Status of the last successful scan
- Link to scan results
Creating a Security Pipeline
To create a new security pipeline, follow these steps:
-
In the Projects section, find the required project and go to the project page
-
Go to the Security Pipeline tab
-
Click the Add Security Pipeline button.

-
On the security pipeline creation page, fill in:
- The required Name field
- The optional Description and Template fields (if necessary)
info
Any other security pipeline created earlier can serve as a template. To add a template, enter the name of the security pipeline you want to reuse in the Template field. By default, the list of templates appears when you start typing in the Template field.
-
Then click the Create button. After creating the security pipeline, you need to add a Security Check to it using the instructions below.
Creating a Security Check
Security Check is an entity that can combine a scanning tool and a source. It is used for:
- Launching security scans
- Receiving scan results
Before adding security checks, ensure that integrations with the required scan sources are configured (in the Integrations → Security Sources section). If adding scan sources is not only done by the system administrator and the user has access to manage scan sources, then the required scan sources must be added.
To add a security check, follow these steps:
-
In the Projects → Project Name → Security Pipelines section, click the Add Security Check button.

-
Fill out the security check creation form.
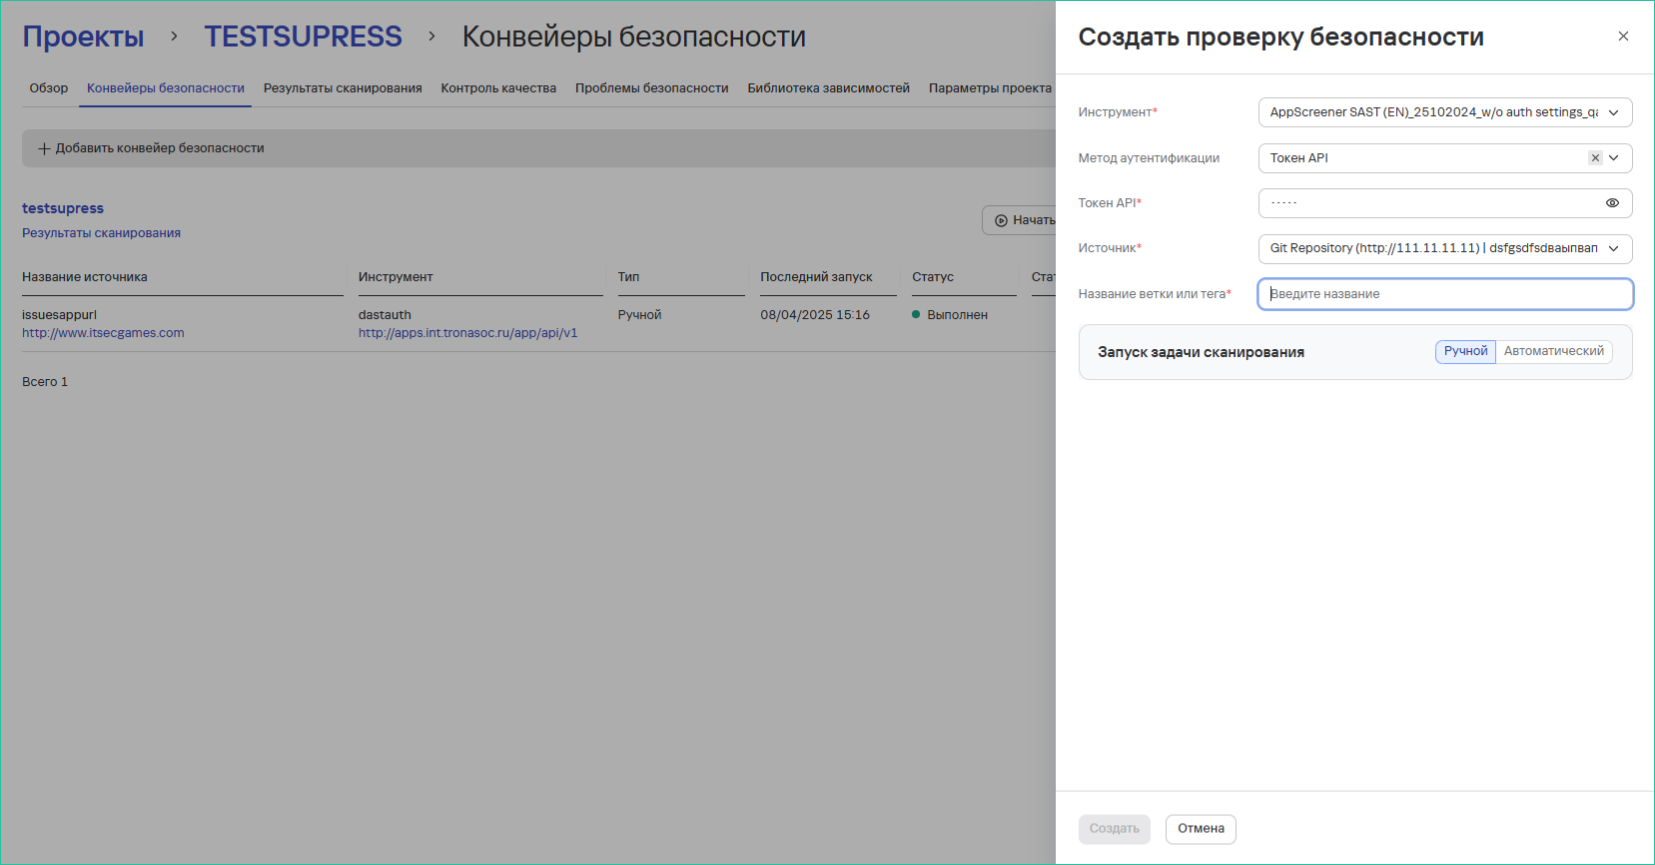
Important points:
- Selecting a security tool is mandatory. Only tools previously added in the Integrations section are available.
- The form fields depend on the selected Source and Tool fields.
- Click the Create button.
Special cases:
- If the system administrator did not specify an authentication method when creating the integration with the security tool:
- The field for selecting an authentication method becomes mandatory
- Authentication data must be entered (depends on the method: API Token, Login/Password)
- If an authentication method was not specified when creating the integration with the scan source:
- Filling in the field for selecting an authentication method becomes mandatory
- Authentication data must be entered

Additional capabilities:
- For some tools, you can choose the scan launch type (manual/automatic)
- For automatic launches, you can configure the frequency and time of launch
- There is an option to test the connection with the tools (the Test Connection button, if active)
Importing results:
Security checks support the upload (import) of scan results from external tools. This option is not available for all security tools.